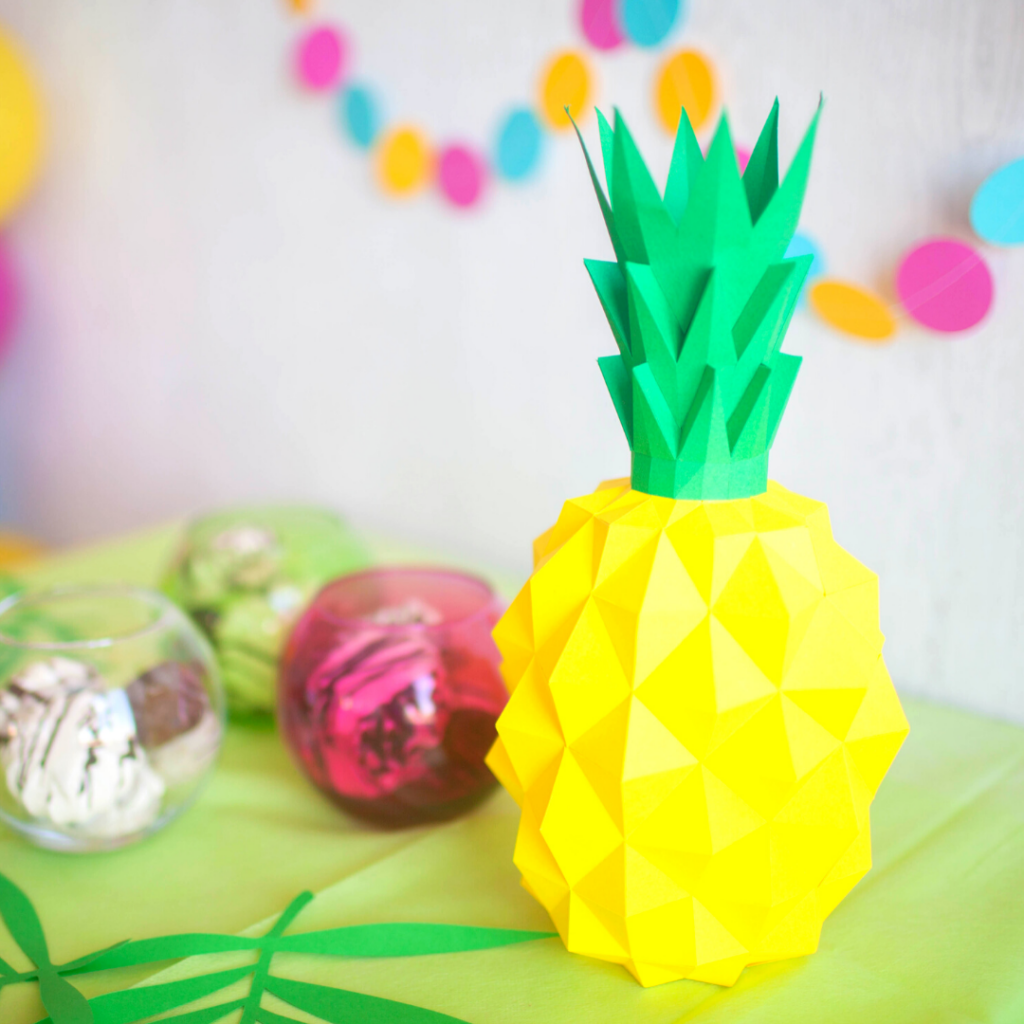
Give Kids Pineapple Crafting Inspiration with These Adorable DIY Ideas!
Pineapples are delicious, heart healthy, and fun to craft. Kids love to craft but aren’t always keen on eating their daily dose of fruits and veggies, so what better way to show how great fruits are than by crafting and creating some? Check out the below crafts!
Pineapple Favor Bags

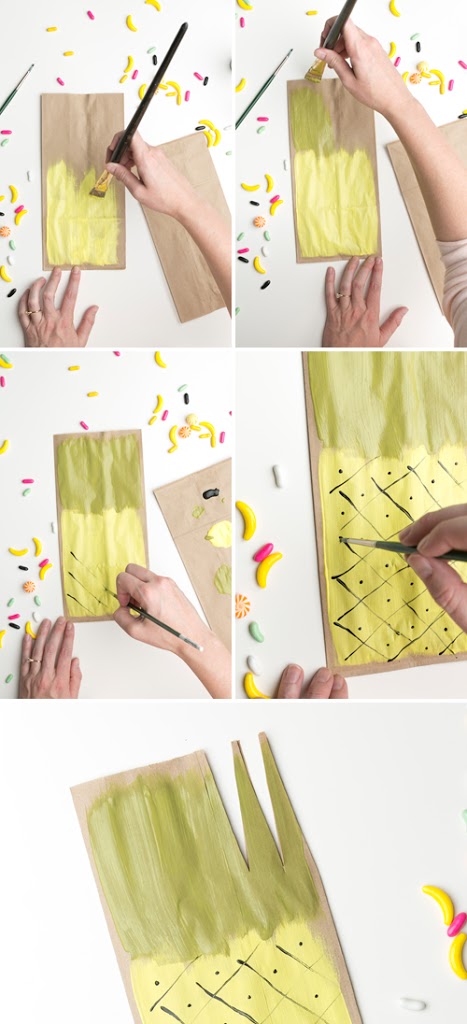
These simple brown paper bags will help kids get excited about eating healthy snacks, not to mention it looks adorable and they can easily make them! Kids can bring these bags to school or use as party favors. Here’s how to make these Pineapple Favor Bags.
What You’ll Need:
- Brown lunch bags
- Paint in yellow, black, and green
- Scissors
- Paint brush
- Twine
Directions:
- Paint the bottom 2/3 of the brown lunch bag yellow
- Paint the top 1/3 green
- Paint thin brush strikes of black in your favorite pineapple design
- Cut long triangles for the top of the lunch bag
- Fill it with treats and/or food and secure with a piece of ribbon or twine
DIY Pineapple Costume

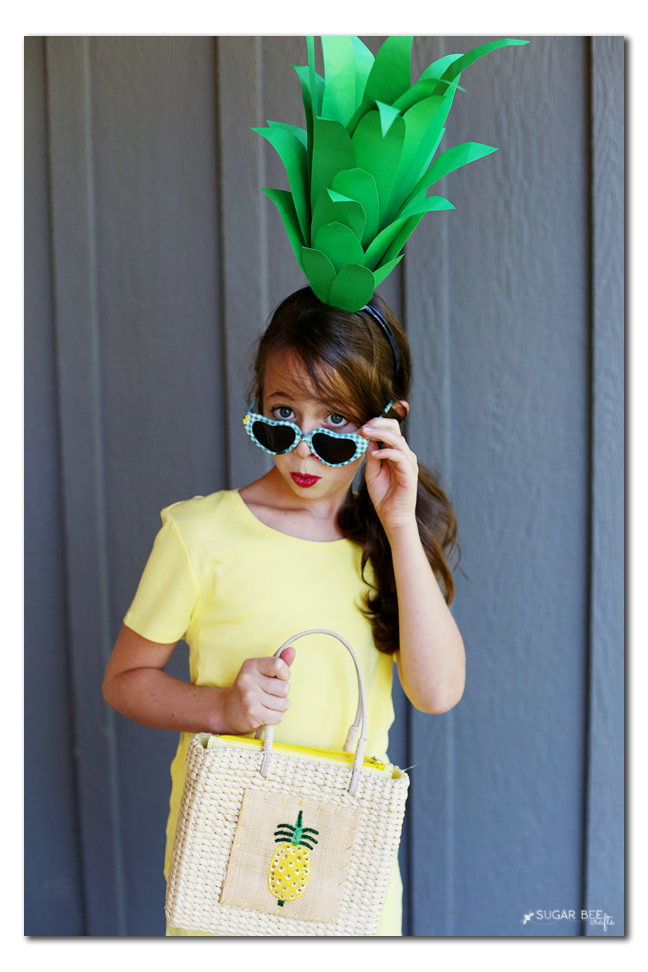
Kids love to play dress-up, so help them dress up as their favorite superfruit with this super simple DIY Pineapple Costume.
What You’ll Need:
- A yellow shirt/dress
- Tan/brown/gold leggings
- A headband
- Green cardstock
- Toilet paper roll
- Hot glue gun
Directions:
- Cut cardstock into various lengths, all having a point at the top.
- Hot glue cardstock on toilet paper roll. It’s recommended to start with the longer pieces at the bottom and end with the shorter pieces, so it looks like the top of the pineapple!
- To attach it to the headband, use leftover leaves, cut into a couples of strips. Glue it around the headband and back on the sides of the tube.
Pineapple Pinecone

When you think of pinecones, normally pineapples don’t come to mind. But this simple, easy, and kid-friendly craft makes pineapples and pinecones go hand in hand! It can be used as tropical decorations for a party or all year long, that the kids can help make.
What You’ll Need:
- Pinecones, wash and set aside to dry
- Yellow acrylic craft paint (or semi-gloss latex house paint if you choose to dip the pinecones in paint)
- Paper: 2 shades of green card stock or white card stock and green pastels/ markers to color the paper (either or work)
- A large paint brush (for coverage) a small paint brush (for hard-to-reach places)
- Scissors
- A pencil
- A hot glue gun or high tack craft glue
Directions:
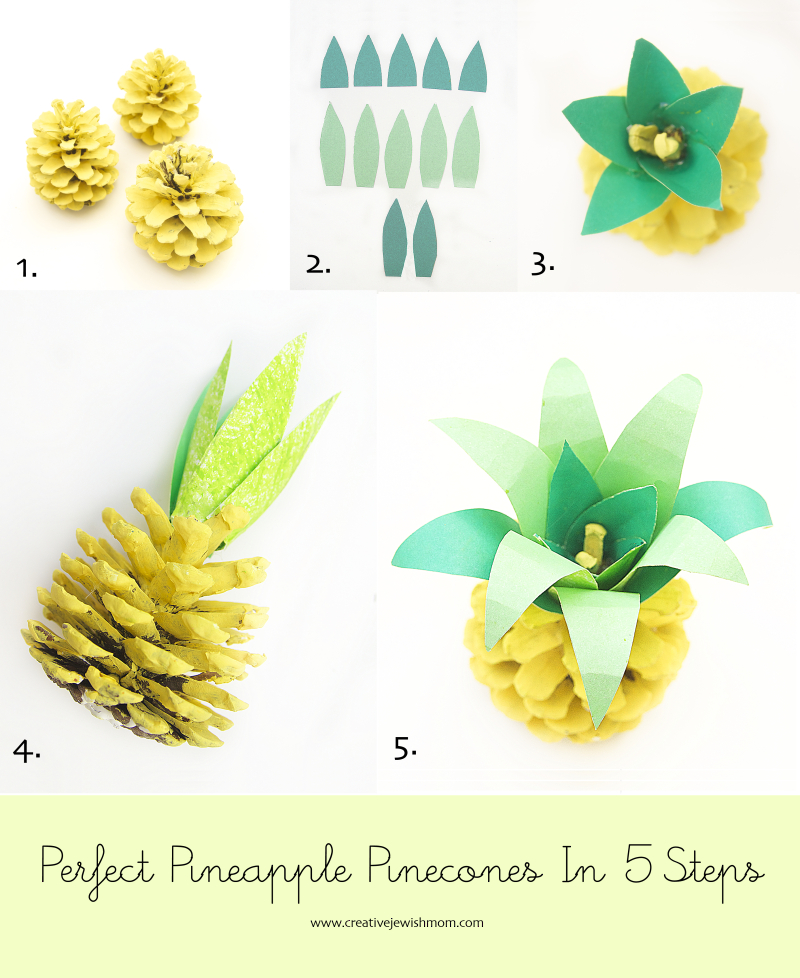
- Paint the pinecones yellow. You will likely need several coats for the best results.
- Cut out leaves as follows: five or six small leaves (no taller than half the height of the pinecone) in dark green, and five or six taller leaves (no taller than the height of the pinecone) in light green, plus two taller leaves in dark green.
- Glue small leaves to center of pinecone as shown. You may need to remove a few of the top scales or bend them towards the center. Each pinecone is a bit different, so you can judge based on each pinecone. The idea is to create a spot that leaves can be easily glued.
- Glue 5 or 6 light green larger leaves behind the smaller leaves. Then add 2 dark green larger leaves opposite one another.
- Gently curl back larger leaves using your fingers or lightly curl them around a pencil. If leaves look too large, trim them.


